@stable-canvas/comfyui-client - v1.5.8
@stable-canvas/comfyui-client


Javascript api Client for ComfyUI that supports both NodeJS and Browser environments.
This client provides comprehensive support for all available RESTful and WebSocket APIs, with built-in TypeScript typings for enhanced development experience. Additionally, it introduces a programmable workflow interface, making it easy to create and manage workflows in a human-readable format.
documentations:
examples:
Features
- Environment Compatibility: Seamlessly functions in both NodeJS and Browser environments.
- Comprehensive API Support: Provides full support for all available RESTful and WebSocket APIs.
- TypeScript Typings: Comes with built-in TypeScript support for type safety and better development experience.
- Programmable Workflows: Introduces a human-readable and highly customizable workflow interface inspired by this issue and this library.
- Ease of Use: Both implementation and usage are designed to be intuitive and user-friendly.
- Zero Dependencies: This library is designed to minimize the introduction of external dependencies and is currently dependency-free.
Installation
Use npm or yarn to install the @stable-canvas/comfyui-client package.
pnpm add @stable-canvas/comfyui-client
CDN
| Format | Link |
|---|---|
| ESM | jsDelivr |
| unpkg | |
| UMD | jsDelivr |
| unpkg |
ComfyUI Dependencies (optional)
To fully utilize the features of this library, your ComfyUI installation needs to support custom nodes for external extensions.
These nodes are used to accept base64 encoded input and forward WebSocket requests.
Note: If you don't need functionalities like
returning images via WebSocket,image to image, orinpainting, you don't need to install these nodes.
- comfyui-tooling-nodes: A crucial extension that provides the ability to handle base64 API transmissions;
image to imageandinpaintingfunctionalities depend on it. - efficiency-nodes-comfyui: This library provides a convenient LoRA manager, which is required in the
src/pipeline/efficientmodule.
Browser Polyfill (optional)
If you plan to use the pipeline feature in a browser environment, you'll need to install the following dependencies and convert File/Image types to Buffer types.
- Buffer: buffer polyfill for browser
- blob-to-buffer: convert blob to buffer
Quick Start
using pipeline
import { BasePipe, outToB64Urls } from "@stable-canvas/comfyui-client";
const client = new Client(); // default localhost comfyui server
Promise.all([
client.getSystemStats(), // HTTP client ping
client.connect(),
])
.then(
([stats, is_connected]) =>
new BasePipe()
.with(client)
.model("sdxl.safetensors")
.prompt("A beautiful sunset over the mountains")
.negative("Low quality, blurry")
.save()
.wait(), // call wait() to start the promise chain
)
.then((output) => outToB64Urls(output))
.then((base64urls) => {
// ["data:image/png...", "data:image/png..."]
})
.finally(() => client.close());
using workflow
import { Client, Workflow, outToB64Urls } from "@stable-canvas/comfyui-client";
const client = new Client(); // default localhost comfyui server
Promise.all([
client.getSystemStats(), // HTTP client ping
client.connect(),
])
.then(([stats, is_connected]) => {
const wk = new Workflow();
// ... define your workflow ...
return wk;
})
.then((wk) => wk.invoke(client))
.then((out) => outToB64Urls(out))
.then((base64urls) => {
// ["data:image/png...", "data:image/png..."]
})
.finally(() => client.close());
Client Usage
First, import the Client class from the package.
import { Client } from "@stable-canvas/comfyui-client";
Client instance, in Browser
const client = new Client({
api_host: "127.0.0.1:8188",
});
// connect ws client
client.connect();
Client instance, in NodeJs
import WebSocket from "ws";
import fetch from "node-fetch";
const client = new Client({
//...
WebSocket,
fetch,
});
// connect ws client
client.connect();
Routes
This library is built on top of ComfyUI's API routes, so it naturally supports all of its available endpoints. For detailed information about the built-in ComfyUI API endpoints, you can refer to this page.
| Function Name | Path | Purpose |
|---|---|---|
client.getExtensions |
GET /extensions |
Retrieve a list of extension URLs. |
client.getEmbeddings |
GET /embeddings |
Retrieve a list of embedding names. |
client.getNodeDefs |
GET /object_info |
Load node object definitions for the graph. |
client.queuePrompt |
POST /prompt |
Queue a prompt with options for prompt data and workflow. |
client.getQueue |
GET /queue |
Retrieve the current state of the queue (running and pending items). |
client.getHistory |
GET /history |
Retrieve the execution history of prompts including node outputs. |
client.clearItems |
POST /queue / POST /history |
Clear the specified list (queue or history). |
client.deleteItem |
POST /queue / POST /history |
Delete a specific item from the queue or history. |
client.interrupt |
POST /interrupt |
Interrupt the execution of the running prompt. |
client.free |
POST /free |
Free memory by unloading models and clearing resources. |
client.getSystemStats |
GET /system_stats |
Retrieve system and device statistics, such as Python version and VRAM. |
If you need documentation on the Client class, you can check out the auto-generated documentation webpage.
Release Model / Free Memory
There are many times when you might need to release memory. You can directly use the encapsulated functions above the Client class instance, like this:
await client.free({ unload_models: true, free_memory: true });
Custom Routes
If you have installed a plugin with custom routes, you may want to call specific routes. You can make requests in the following way (assuming the route is /get_something):
const res = await client.fetchApi("/get_something");
const data = await res.json();
Advanced functions
In addition to the standard API interfaces provided by comfyui, this library also wraps them to provide advanced calls
enqueue
const result = await client.enqueue(
{ /* workflow prompt */ },
{
progress: ({max,value}) => console.log(`progress: ${value}/${max}`);
}
);
It's very simple; it includes the entire prompt interface life cycle and waits for and collectively returns the result at the end of the request
In some cases you might not want to use ws, then you can use
enqueue_polling, this function will perform similar behavior toenqueue, but uses rest http to poll the task status
Get XXX
Sometimes you may need to check some configurations of ComfyUI, such as whether a deployment service contains the needed model or lora, then these interfaces will be useful
getSamplers getSchedulers getSDModels getCNetModels getUpscaleModels getHyperNetworks getLoRAs getVAEs
Pipeline Usage
The pipeline is a simple DSL implementation in this library that allows for easy creation of simple workflows and immediate results.
Text to Image
import { BasePipe } from "@stable-canvas/comfyui-client";
new BasePipe()
.with(/* client instance */)
.model("sdxl.safetensors")
.prompt("A beautiful sunset over the mountains")
.negative("Low quality, blurry")
.size(1024, 768)
.steps(35)
.cfg(5)
.save()
.wait() // call wait() to start the promise chain
.then(({ images }) => {
// process images array
})
.finally(() => client.close());
Image to Image with Task Status Monitoring
import { BasePipe } from "@stable-canvas/comfyui-client";
import fs from "fs";
new BasePipe()
.with(/* client instance */)
.model("sdxl.safetensors")
.image(fs.readFileSync("path-to-your-input-image.jpg"))
// .mask(maskImage) // call mask() to add a mask
.prompt("A husky with pearls, oil painting style")
.negative("Low quality, blurry")
.size(640, 960)
.steps(35)
.cfg(7)
.denoise(0.5)
.save()
.on("progress", console.log)
.wait()
.then(({ images }) => {
// Process generated images
})
.finally(() => client.close());
LoRAs and CNets with Efficient
EfficientPipe is based on the Efficient series nodes provided by efficiency-nodes-comfyui to expand lora/cnet features.
import { EfficientPipe } from "@stable-canvas/comfyui-client";
const input_image = /* image data Buffer() */;
const { images } = await new EfficientPipe()
.with(client)
.model("sd15.safetensors")
.seed()
.image(input_image)
.prompt("furry, A husky girl with pearls, oil painting style")
.negative("low quality, blurry")
.size(640, 960)
.steps(35)
.cfg(5)
.denoise(0.6)
.cnet("control_v11p_sd15_openpose.pth", input_image)
.lora("LowRA.safetensors")
.lora("add_detail.safetensors")
.save()
.wait();
more examples
For complete example code, refer to the files ./examples/nodejs/src/main-pipe-*.ts in the project repository.
Workflow Usage
Programmable/Human-readable pattern
Inspired by this issue and this library, this library provides a programmable workflow interface.
It has the following use cases:
- Interactive GUI Integration: Offers support for seamless integration with ComfyUI's new GUI, enhancing user interaction possibilities.
- LLMs for Workflow Generation: Leverages the ability of large language models to understand Javascript for creating workflows.
- Cross-Project Workflow Reuse: Enables the sharing and repurposing of workflow components across different projects using ComfyUI.
- Custom Node Creation: Assists in developing and integrating custom nodes into existing workflows for expanded functionality.
- Workflow Visualization: Facilitates a clearer understanding of workflows by translating them into a visual format suitable for ComfyUI's GUI.
- Model Research and Development: Provides a framework for leveraging ComfyUI nodes in machine learning research without execution capabilities.
- Script-Driven Workflow Templates: Enables the generation of templated workflows through scripting for consistent and efficient project setups.
- Web UI-independent Workflow Deployment: Enables the creation and deployment of workflows without reliance on a web-based user interface.
Minimal case
Here is a minimal example demonstrating how to create and execute a simple workflow using this library.
import { Workflow } from "@stable-canvas/comfyui-client";
const workflow = new Workflow();
const cls = workflow.classes;
const [model, clip, vae] = cls.CheckpointLoaderSimple({
ckpt_name: "sdxl.safetensors",
});
const enc = (text: string) => cls.CLIPTextEncode({ text, clip })[0];
const [samples] = cls.KSampler({
seed: Math.floor(Math.random() * 2 ** 32),
steps: 35,
cfg: 4,
sampler_name: "dpmpp_2m_sde_gpu",
scheduler: "karras",
denoise: 1,
model,
positive: enc("best quality, 1girl"),
negative: enc("worst quality, bad anatomy, embedding:NG_DeepNegative_V1_75T"),
latent_image: cls.EmptyLatentImage({
width: 512,
height: 512,
batch_size: 1,
})[0],
});
cls.SaveImage({
filename_prefix: "from-sc-comfy-ui-client",
images: cls.VAEDecode({ samples, vae })[0],
});
console.log(
// This call will return a JSON object that can be used for ComfyUI API calls, primarily for demonstration or debugging purposes
workflow.workflow(),
);
Programable real world case
Both implementation and usage are extremely simple and human-readable. This programmable approach allows for dynamic workflow creation, enabling loops, conditionals, and reusable functions. It's particularly useful for batch processing, experimenting with different models or prompts, and creating more complex, flexible workflows.
This specific workflow demonstrates the generation of multiple images using two different AI models ("lofi_v5" and "case-h-beta") and four different dress styles. It showcases how to create a reusable image generation pipeline and apply it across various prompts and models efficiently.
Below is a simple example of creating a workflow:
const createWorkflow = () => {
const workflow = new Workflow();
const {
KSampler,
CheckpointLoaderSimple,
EmptyLatentImage,
CLIPTextEncode,
VAEDecode,
SaveImage,
NODE1,
} = workflow.classes;
const width = 640;
const height = 960;
const batch_size = 1;
const seed = Math.floor(Math.random() * 2 ** 32);
const pos = "best quality, 1girl";
const neg = "worst quality, bad anatomy, embedding:NG_DeepNegative_V1_75T";
const model1_name = "lofi_v5.baked.fp16.safetensors";
const model2_name = "case-h-beta.baked.fp16.safetensors";
const sampler_settings = {
seed,
steps: 35,
cfg: 4,
sampler_name: "dpmpp_2m_sde_gpu",
scheduler: "karras",
denoise: 1,
};
const [model1, clip1, vae1] = CheckpointLoaderSimple({
ckpt_name: model1_name,
});
const [model2, clip2, vae2] = CheckpointLoaderSimple({
ckpt_name: model2_name,
});
const dress_case = [
"white yoga",
"black office",
"pink sportswear",
"cosplay",
];
const generate = (model, clip, vae, pos, neg) => {
const [latent_image] = EmptyLatentImage({
width,
height,
batch_size,
});
const [positive] = CLIPTextEncode({ text: pos, clip });
const [negative] = CLIPTextEncode({ text: neg, clip });
const [samples] = KSampler({
...sampler_settings,
model,
positive,
negative,
latent_image,
});
const [image] = VAEDecode({ samples, vae });
return image;
};
const save = (image, filename_prefix) =>
SaveImage({
images: image,
filename_prefix,
});
for (const cloth of dress_case) {
const input_pos1 = `${pos}, ${cloth} dress`;
const image1 = generate(model1, clip1, vae1, input_pos1, neg);
const input_pos2 = `${pos}, ${cloth} dress`;
const image2 = generate(model2, clip2, vae2, input_pos2, neg);
save(image1, `${cloth}-lofi-v5`);
save(image2, `${cloth}-case-h-beta`);
}
return workflow;
};
Yes, you read that right—we will repeatedly create some nodes, which might seem counterintuitive, but it's perfectly fine because the workflow will not be rendered within the ComfyUI server. Instead, it will execute each node sequentially, so even if creating a workflow with thousands of nodes is executable and correct.
Notably, you can also leverage all your JavaScript programming knowledge, such as recursion, functional programming, currying, etc. For example, you can do something like this:
const generator = (model) => (clip) => (vae) => (pos) => (neg) => {
const [latent_image] = EmptyLatentImage({
width,
height,
batch_size,
});
const [positive] = CLIPTextEncode({ text: pos, clip });
const [negative] = CLIPTextEncode({ text: neg, clip });
const [samples] = KSampler({
...sampler_settings,
model,
positive,
negative,
latent_image,
});
const [image] = VAEDecode({ samples, vae });
return image;
};
const model1_gen = generator(model1)(clip1)(vae1);
Invoke workflow
const wf1 = createWorkflow();
const result = await wf1.invoke(client);
Q: What is the relationship between workflow and client? ?
A: If you need to refer to complete example code, you can check out the ./examples/nodejs/main*.ts entry files. These contain fully executable code examples ranging from the simplest to slightly more complex workflows.
type support
- builtin node types
- builtin node params

- any other node
InvokedWorkflow
If you need to manage the life cycle of your request, then this class can be very convenient
instance
// You can instantiate manually
const invoked = new InvokedWorkflow(
{
/* workflow payload */
},
client,
);
// or use the workflow api to instantiate
const invoked = your_workflow.instance();
running
// job enqueue
await invoked.enqueue();
// job result promise
const job_promise = invoked.wait();
// if you want interrupt it
invoked.interrupt();
// query job status
invoked.query();
Client Plugin
We provide Plugin to expand Client capabilities.
simple example
import { Plugin } from "@stable-canvas/comfy";
export class LoggingPlugin extends Plugin {
constructor() {
super();
this.addHook({
type: "function",
name: "fetch",
fn: async (original, ...args) => {
console.log("fetch args", args);
const resp = await original(...args);
console.log("fetch resp", resp);
return resp;
},
});
}
}
ComfyUI Login Auth
For example, sometimes you may need to provide node authentication capabilities, and you may have many solutions to implement your ComfyUI permission management
If you use the ComfyUI-Login extension, you can use the built-in plugins.LoginAuthPlugin to configure the Client to support authentication
import { Client, plugins } from "@stable-canvas/comfyui-client";
const client = /* client instance */;
client.use(
new plugins.LoginAuthPlugin({
token: "MY_TOP_SECRET"
})
);
Events
Subscribing to Custom Events
If your ComfyUI instance emits custom WebSocket events, you can subscribe to them as follows:
client.events.on("your_custom_event_type", (data) => {
// 'data' contains the event payload object
console.log("Received custom event:", data);
});
Handling Unsubscribed Events
To capture and process events that haven't been explicitly subscribed to, use the unhandled event listener:
client.events.on("unhandled", ({ type, data }) => {
// 'type' is the event type
// 'data' is the event payload object
console.log(`Received unhandled event of type '${type}':`, data);
});
Handling All Event Messages
Register the message event to subscribe to all WebSocket messages pushed from ComfyUI
client.events.on("message", (event) => {
if (typeof event.data !== "string") return;
const { type, data } = JSON.parse(event.data);
// ...
});
Handling Workflow Events
If you've created a workflow instance, you can also subscribe to events emitted by that instance:
const invoked_wk = workflow.instance(client);
const invoked_wk = /* or new InvokedWorkflow() */;
invoked_wk.on("execution_interrupted", () => {
console.log("Workflow execution interrupted");
});
Custom Resolver
Sometimes, you might use ComfyUI to generate non-image outputs, such as music, text, object detection results, etc. In these cases, you'll need a custom resolver, as the default behavior of this library primarily focuses on handling image generation.
Here's how to define a custom resolver:
Suppose you have a final output node is custom non-image node, and its output might be
{ "result": "hi, I'm phi3" }.
const resolver = (resp, node_output, ctx) => {
// const { client, prompt_id, node_id } = ctx;
return {
...resp,
data: resp.data ?? node_output.result,
};
};
You can then use this resolver with client.enqueue:
const prompt = { ... };
const resp = await client.enqueue<string>(prompt, { resolver });
console.log(resp.data); // "hi, I'm phi3"
You can also apply the same resolver to a workflow using workflow.invoke:
const workflow = /* class Workflow */;
const result = await workflow.invoke(client, { resolver });
console.log(result.data); // "hi, I'm phi3"
Handling Non-Standard Node Names
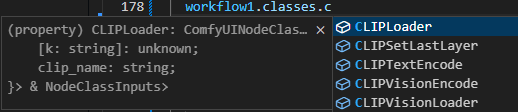
ComfyUI does not enforce strict naming conventions for nodes, which can lead to custom nodes with names containing spaces or special characters. These names, such as Efficient Loader, DSINE-NormalMapPreprocessor, or Robust Video Matting, are challenging to use directly as variable names in code.
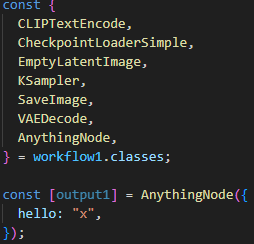
To address this issue, we provide the workflow.node interface. This interface allows you to create nodes using string-based names, regardless of whether they conform to standard variable naming rules.
const workflow = new Workflow();
// ❌Incorrect: Cannot destructure directly
// const { Efficient Loader } = workflow.classes;
// ✅Correct: Use the workflow.node method to create nodes
const [output1, output2] = workflow.node("Efficient Loader", {
// Node parameters
});
What is ./script/data/\*.json
comfyui.node.types.json
This file comes from the ComfyUI runtime and is used during code generation to annotate output types.
(The “types” here refer to internal types used by ComfyUI; in the generated code, they are only written as comments without any type checking.)
It is generated by a script. Since the script is extremely simple, it doesn’t make sense to open source it for now. Also, whether this file is correct or not does not affect the use of the library, so it won’t be updated in real-time.
Workflow to code
A common user case: You need to convert a workflow into code, modify it, or integrate it into your project.
Here, we provide very convenient tools to help you achieve this goal. We offer both an online Transpiler and a CLI. Using either of these methods, you can input a workflow (PNG or JSON), and it will be converted into code that complies with the requirements of this library.
For relatively simple text-to-image workflows, you can almost use the generated code directly.
For more complex workflows, you only need to make minor adjustments to the inputs and outputs to use them.
1. Online Transpiler
https://stablecanvas.github.io/tool-w2c/
Online convert workflow to code.
2. CLI
npm install @stable-canvas/comfyui-client-cli
This tool converts the input workflow into executable code that uses this library.
Usage: nodejs-comfy-ui-client-code-gen [options]
Use this tool to generate the corresponding calling code using workflow
Options:
-V, --version output the version number
-t, --template [template] Specify the template for generating code, builtin tpl: [esm,cjs,web,none]
(default: "esm")
-o, --out [output] Specify the output file for the generated code. default to stdout
-i, --in <input> Specify the input file, support .json/.png file
-h, --help display help for command
more info: https://github.com/StableCanvas/comfyui-client/tree/main/packages/cli
Roadmap
- workflow to code: Transpiler workflow to code
- .json => code
- .png => code
- code to workflow: Output a json file that can be imported into the web front end
- Output type hints
Contributing
Contributions are welcome! Please feel free to submit a pull request.
Building
# Prior to the first build: `npm run build-types` to generate types for Comfy nodes.
npm run build-types
npm run build
License
MIT